Showing posts with label neck embroidery pattern. Show all posts

Sunday, May 13, 2018

Hand Embroidery: Kutchwork Neck Design Video

This is part I of Neck embroidery design with Kutch and Mirror work. In this part I will show you how to mark Neckline and make the design for tracing. In the second part you will learn how to do the embroidery and fix the mirror on fabric. I hope you will find this tutorial helpful. Please share your thoughts about this video.
Here is the tracing:
how to make tracing for neck embroidery design
Here is the video:


Thursday, April 21, 2016

Kurti Pattern/Design-4

Tutorial on how to sew and design kurti
Today I am showing you a Kurti design with patch work and machine embroidery. This is a designer kurti  differenet color cloth are used in front and back. On the top of front side black color patch is being attached. First of all  draw a neck, trace motif for embroidery and complete it. For embroidery zigzag stitch is being used with normal sewing thread. For the outline back stitch is used with silver thread. If you know machine embroidery you can complete outline with machine, as this was my first machine embroidery project I found easy to outline it with hand embroidery. After comleting embrodery iron it and then taking back part cloth make draft according to your measurements, instructions are given below:
Drafting instructions for kurti and sleeves
A-K is kurti's length.
A-E is shoulder width.
A-D is neck width(standard is 3")
A-B is back neck
A-C is front neck
E-F is armhole cutting of back side.
E-G is front side armhole cutting.
H-G is 1/2 of waist measurement +1"
I-J is 1/2 of hip measurement +1/2"
K-L is 1/2 width of kurti(ghera).
Sleeve Draft.
A-D is half of armhole width.
A-B is length of sleeves.
B-C is arm width.
AFE1D is back side curve of sleeve.
AFED is front side curve of sleeve.
Draft and cut both arms with black color cloth.
Sewing Instructions
Take fusion paper draw neckline over it, cut it, place the glue side of fusion paper on the wrong side of cloth, stick it with the help of iron, cut extra cloth.
On the right side of cloth stitch neckline with fushion side facing up, turn the cloth side and finish neckline with hem or machine stitch.
embroidery motif for kurti

cutting front and back part of kurti

preparing neckline for kurti
Prepare back neck with bias strip.
Joint both shoulder part.
Attach sleeves.
Finally prepare slit parts and bottom folding.

Thursday, August 20, 2015

Sindhi Embroidery Neck Design-2

sindhi embroidery design on suit neck
Today I am showing you another neck pattern of Sindhi Embroidery. This design is made up of two patterns, one is square pattern and second is sindhi stitch border. If you are new to my blog for learning these patterns you can refer to my earlier posts : Sindhi Stitch Guide ( image no 3,4,5)
for borders(image no 1 and 2.)

I got this neck design traced from local market, you can take printout of design and trace it on cloth.
design for tracing sindhi embroidery(kutch embroidery) on cloth

Beside sindhi embroidery stitches simple satin stitch(dots are filled), running stitch and shadow work (wrong side of shadow work) is used in this pattern.
Once design is traced you can start embroidery.
filling of shadow work and running stitch

Note: Usually we do embroidery with 2 strands of thread but in this motif I have used 3 strands of thread.


Thursday, September 12, 2013

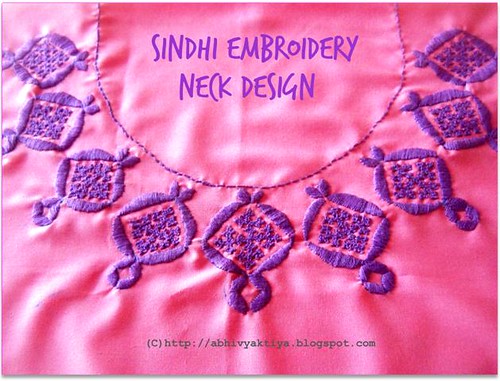
Sindhi Embroidery Neck Design

design of sindi embroidery for kurta neck
Sindhi Embroidery Neck Pattern <
Today I am showing you neck pattern of Sindhi Embroidery. The basic building block of this neck pattern is square pattern of sindhi embroidery which is covered with outer design filled with simple satin stitch and is forming complete motif.Whole neck pattern comprise of nine motifs. Instructions: To make this pattern you have to perform the following steps.

  •   First of all draw the ouline of neck(considering you neckline’s depth may be 6” or 6 and ½ “) 
  •  Draw a single pattern on paper.

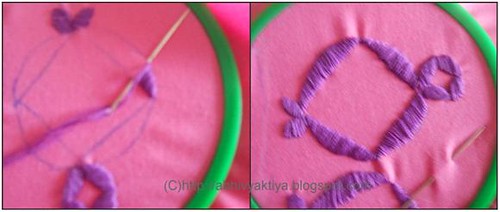
step by step instructions for neck pattern
  • Make a mark on the center of neck.
  • With the help of pin fix carbon paper and design paper on cloth.
  • With pencil draw the design, trace marks of design will appear on paper.
  • Now proceed towards the left or right side of paper.
step by step instructions
  • Make marks for 4-5 patterns on both side (depend upon the depth of neck line)
  •  Follow the steps from 4-5 trace all the motifs on both sides.
  •  Trace of neck pattern is complete.
  •  Fill the outer design with the help of simple satin stitch.
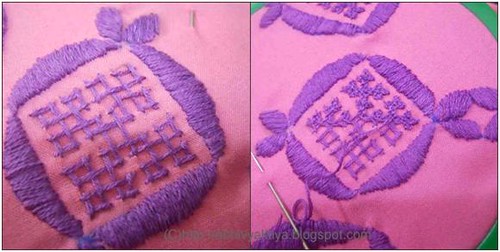
  •  For inner sindhi embroidery design please refer to my earlier post that gives you the detailed instructions for this square pattern.in Sindhi Stitch Guide ( image no 5)

step by step instructions


  • Complete all the nine motifs with square pattern.
  • Finally make outline of neck with any fancy stitch. Notes: If you can first of all trace all nine motifs on single paper and then trace the entire design in one sitting on kurta. This way you don’t have to make adjustments or check marks while tracing the pattern. Some other suggestions of Sindhi Embroidery from my blog are Sindhi embroidery design on kurta.Sindhi embroidery border on kurta.